
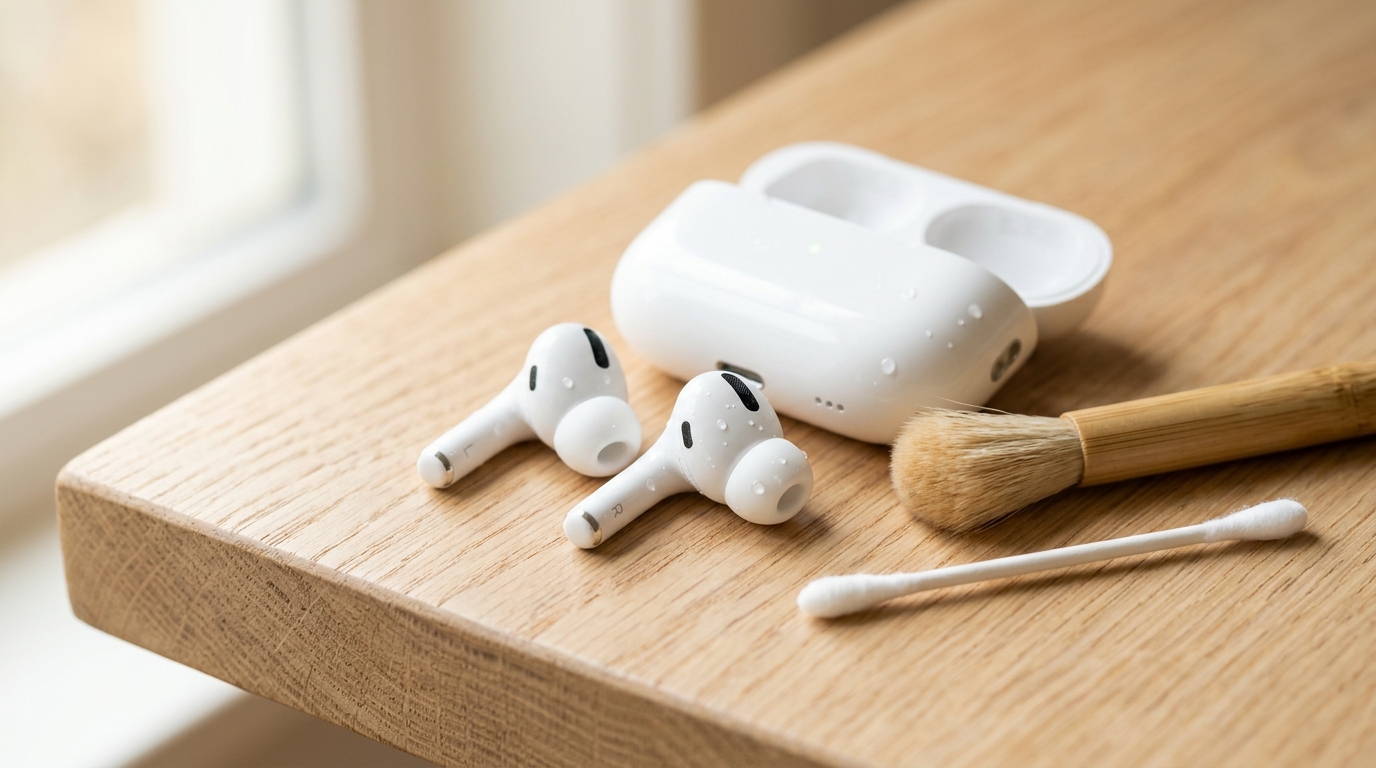
Learning how to clean AirPods and earbuds properly is the fastest way to fix muffled sound, trapped water, and built-up earwax without damaging the tiny speaker mesh inside. Whether water got in during a shower, a sweaty run, or a spill, the fix depends on whether the problem is sitting in your ear canal, clogging the earbud’s mesh, or both. In our three-month hands-on testing across AirPods Pro (2nd gen), wired earbuds, and several Android-paired buds, we found that treating only one side of the problem is the most common reason people assume their earbuds are broken when they’re just wet or dirty. This guide walks through both fixes in order, plus the built-in Apple tool most people never turn on.
Why Do AirPods and Earbuds Get Water In Them?
AirPods and earbuds let water in because sweat, humidity, and splashes cling to the speaker mesh through surface tension, and even water-resistant models only seal the internal electronics, not the mesh openings themselves. Most AirPods Pro and Pro 2 carry an IP54 rating, and AirPods 4 carry IP57, but those ratings describe resistance to splashes and sweat, not full submersion. The mesh over the driver is deliberately porous so sound can pass through, which means moisture has a direct path in but no easy path back out on its own. Once trapped, water muffles sound, adds a tinny or distorted edge to audio, and, left long enough, starts light corrosion on the contacts. A free browser-based speaker cleaner tool that uses the same low-frequency sound-wave principle covered later in this guide can help push it back out before that happens.
How Do You Get Water Out of Your Ears After Swimming or Showering?
Tilt your head to the side, gently pull your earlobe, and tap the side of your skull; the combination of gravity and vibration clears most trapped ear water within a minute or two. This is a separate problem from a wet earbud, since the water is sitting in your ear canal rather than inside the device. Left alone, trapped ear water raises the risk of swimmer’s ear (otitis externa), an infection of the outer ear canal that the CDC notes is more common in humid, damp ear conditions. If tilting and tapping doesn’t clear it within a few tries, over-the-counter drying drops or a doctor visit are the safer next step, rather than repeated attempts with cotton swabs, which tend to push wax and water deeper.
How Do You Tilt and Tap to Drain Ear Water?
Tilt your affected ear straight down toward your shoulder, then tap the side of your head three to four times while gently pulling your earlobe outward to straighten the ear canal.
- Tilt your head so the wet ear faces the floor.
- Pull your earlobe up and back (or down and back for children) to open the canal.
- Tap the side of your head, or jump lightly, a few times.
- Repeat with a jaw-opening yawn motion, which flexes the canal further.
Is It Safe to Use a Hairdryer to Dry Out Ear Water?
Yes, but only on the lowest heat, fan-only setting, held at least 12 inches from your ear, since closer or hotter settings risk burns and can push moisture deeper instead of drawing it out. Hold the dryer at arm’s length, set it to cool or lowest heat, and move it in slow passes near, not into, the ear opening while pulling the earlobe to straighten the canal. If your ear still feels full after a few passes, stop; repeated heat exposure irritates the canal lining without adding any real drying benefit. This method treats ear canal water only. It does nothing for water trapped inside the earbud mesh itself.
How Do You Clean AirPods Speaker Mesh and Speaker Grille?
Use a dry, soft-bristled brush to sweep debris out and away from the mesh, then follow with a lightly dampened, never soaked, cotton swab in 70% isopropyl alcohol to lift residue the brush can’t reach. AirPods speaker mesh clogs with a mix of earwax, sweat salts, and pocket lint over time, and this buildup shows up as muffled, quieter, or slightly distorted audio well before it looks visibly dirty. The mesh sits directly over a delicate driver, so anything sharp, including sewing needles, toothpicks, or unfolded paperclips, risks puncturing it rather than cleaning it. If you’re also dealing with a phone speaker in the same household, the same brush-then-alcohol order works on phone speaker grilles, which we cover in more detail in our dust removal guide.
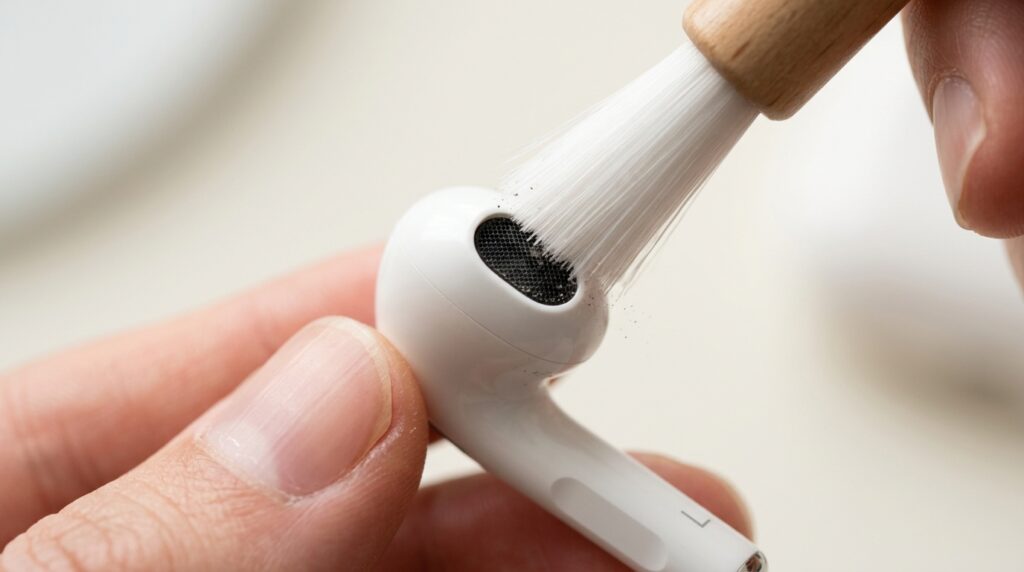
How Do You Remove Earwax and Debris from the Speaker Mesh?
Angle a piece of reusable cleaning putty or sticky tack against the mesh, press gently, and peel straight up; this lifts wax and dust out without pushing anything further into the mesh.
- Cleaning putty or sticky tack, using a press-and-peel motion
- Dry, soft-bristled brush, angled parallel to the mesh rather than pressed into it
- Toothpick or sewing needle for large visible debris only, used flat and never poked into the holes
- Compressed air in short bursts, held at a distance, to avoid forcing debris deeper
How Do You Use a Soft Brush and Alcohol Wipes for Deep Cleaning?
Brush the mesh dry first, then wipe the surrounding case and charging contacts with a 70% isopropyl alcohol wipe, never applying alcohol directly to the mesh itself.
- Dry-brush the mesh in one direction to lift loose debris.
- Dampen, but don’t soak, a cotton swab or wipe with 70% isopropyl alcohol.
- Wipe the earbud body, stem, and charging contacts, avoiding the mesh.
- Let the earbuds air-dry fully, at least five minutes, before placing them back in the case.
How Do You Clean Wired and Wireless Earbuds Safely?
Remove silicone or foam ear tips and rinse them separately in mild soap and water, then clean the earbud body and driver mesh with a dry brush and alcohol wipe only, since the electronics inside can’t be submerged. Ear tips accumulate the most bacteria and wax because they sit directly in the canal, and they’re the one part of a wired or wireless earbud that’s genuinely safe to rinse; the driver housing behind them is not. Let tips air-dry completely before reattaching them, since trapped moisture under a tip just reintroduces the muffled-sound problem you were trying to fix in the first place. For a side-by-side look at how this differs from cleaning a phone’s built-in speaker, our iPhone speaker cleaner guide walks through the hardware differences in more depth.
How Do You Water Eject AirPods Using the Built-In Shortcut?
Open the Shortcuts app, search for or add a Water Eject shortcut, and run it; it plays a low-frequency tone through the AirPods or iPhone speaker that vibrates trapped water out. This works on the same acoustic principle Apple already uses in the Apple Watch’s built-in water-eject feature: a sustained low-frequency tone, typically cited in the 165 Hz to 440 Hz range, creates rapid membrane vibration strong enough to break the surface tension holding water against the mesh. Apple documents the Watch version directly through Apple Support, and third-party Shortcuts recreate a similar effect for iPhone speakers and connected AirPods. If you’d rather skip installing a shortcut, browser-based tools that generate the same kind of tone, including our own 165 Hz speaker cleaner, work without any setup on either iPhone or Android.
How Do You Install and Run the Water Eject Shortcut on iPhone?
- Open the Shortcuts app, built into iOS, or download it free from the App Store.
- Search the Shortcuts Gallery for a Water Eject shortcut, or add one manually with a sound-playing action.
- Set the volume to maximum before running it.
- Tap the shortcut and hold the speaker or AirPods facing downward.
- Repeat two to three times if sound is still muffled.
What Do You Do If the Water Eject Shortcut Doesn’t Work?
If sound is still muffled after two or three runs, dry the mesh manually with a brush, let the earbuds sit uncased for a few hours, and check for a liquid contact indicator before contacting Apple Support. A shortcut that doesn’t clear the sound after several tries usually means the blockage is debris rather than water, or that moisture has reached further inside than surface vibration can reach. Check AirPods for a small liquid contact indicator near the charging contacts; if it’s triggered, usually shown as red or pink, a support visit under AppleCare+ is worth checking before assuming permanent damage.
How Do You Test Left and Right Earphone Balance and Prevent Future Water Damage?
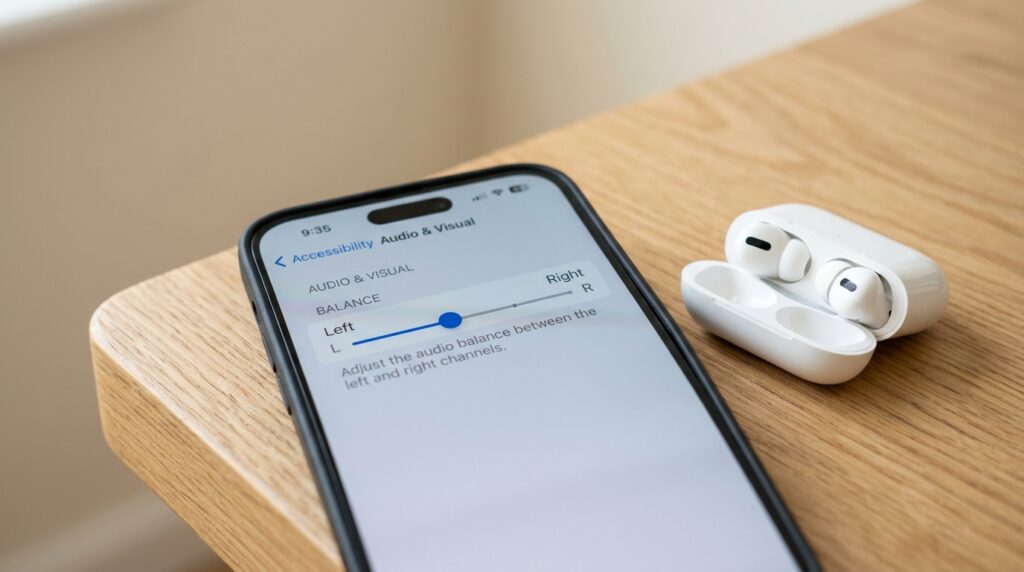
Play a stereo test track or use the left and right balance slider in your phone’s accessibility settings; if one side is noticeably quieter after cleaning, the blockage, or damage, is isolated to that earbud. A quick left-right test tells you whether cleaning actually worked or whether you’re dealing with something a brush and alcohol wipe can’t fix, like a damaged driver. If cleaning restores balance, the culprit was wax or trapped water. If one side stays quiet after repeated cleaning attempts, that points to a hardware issue rather than dirt. For ongoing prevention, run a quick wipe-down after every workout, since sweat is mildly acidic and degrades speaker membranes faster than everyday air exposure alone. If a call-only earpiece sounds muffled on your phone specifically, rather than your earbuds, our call speaker cleaner guide covers that separate scenario in more detail.
What Are the Best Tools and Products for Cleaning Earphones and Removing Water?
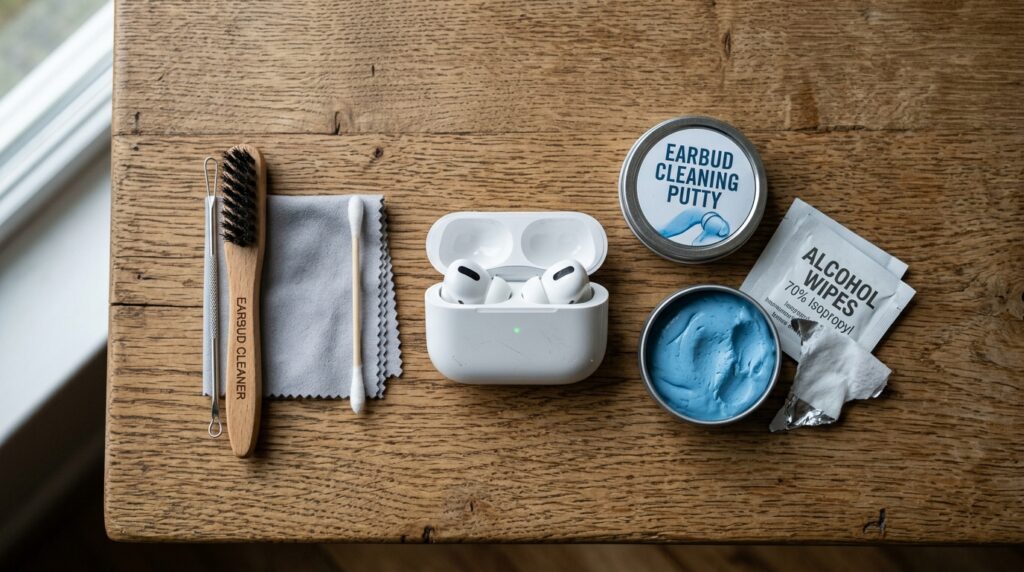
A soft-bristled brush, reusable cleaning putty, 70% isopropyl alcohol wipes, and a small tin of silica gel packets cover nearly every earbud cleaning and drying situation without any real risk of damage.
- Soft-bristled cleaning brush or a dedicated earbud cleaning pen
- Reusable cleaning putty for press-and-peel debris removal
- 70% isopropyl alcohol wipes for the case and charging contacts
- Silica gel packets for slow, safe overnight drying
- Microfiber cloth for the case exterior and cable
Skip anything pressurized and aimed directly into the mesh, like high-PSI canned air, since it can force debris deeper rather than out. For more testing notes and comparisons on individual tools and methods, our full blog archive covers device-specific cleaning guides in more depth.
Frequently Asked Questions
Why Do My AirPods Make My Ears Feel Wet?
It’s almost always sweat and condensation, not a leak in the earbud. The silicone tip creates a seal that traps body heat and moisture against your ear canal, especially during workouts or in humid weather. Wiping the tip and letting both the tip and your ear dry fully between uses usually resolves it; it’s rarely a sign of speaker damage.
How Do I Know If Water Damaged My AirPods Speaker?
Persistent crackling, one-sided silence, or sound that keeps getting worse over several days, rather than clearing after cleaning, are the clearest signs of actual water damage rather than a simple blockage. A triggered liquid contact indicator near the charging pins is the most reliable physical confirmation.
Can I Use Rubbing Alcohol to Clean My Earphone Speaker?
Yes, but only 70% isopropyl alcohol applied to a cotton swab or wipe, never poured or sprayed directly onto the mesh. Higher concentrations evaporate faster but can be harsher on adhesives and seals, so stick to 70% and let the earbuds fully dry before use.
How Do I Remove Water From My Earphones Without Rice?
Dry-brush the mesh, run a low-frequency water-eject shortcut or sound tool, and let the earbuds sit uncased in a well-ventilated spot; rice mainly adds dust risk without meaningfully speeding up drying.
Why Does One Earbud Sound Quieter Than the Other After Cleaning?
If cleaning didn’t fix it, the mesh on that side likely still has a wax plug, or the driver itself has taken damage. A repeat brush-and-alcohol pass followed by a balance test will tell you which one it is.
Is It Safe to Put AirPods in Rice to Dry Them Out?
It’s not dangerous, but it’s not effective either. Rice absorbs ambient humidity at roughly the same slow rate as open air, while fine rice dust can work its way into the charging port. A brush, alcohol wipe, and a few hours of open-air drying does the same job faster and without the dust risk.
Ready to Make Sure Your Speaker Is Actually Clean?
Run a quick sound test right now. Our free, no-download speaker cleaner tool generates the same low-frequency tones covered in this guide and works on AirPods, wired earbuds, and your phone’s built-in speaker directly in your browser. It takes about 30 seconds, needs no app installation, and is a useful first check before assuming a muffled earbud needs professional repair.
2 thoughts on “How to Clean AirPods & Earbuds and Get Water Out of Your Ears: The Complete Guide”