
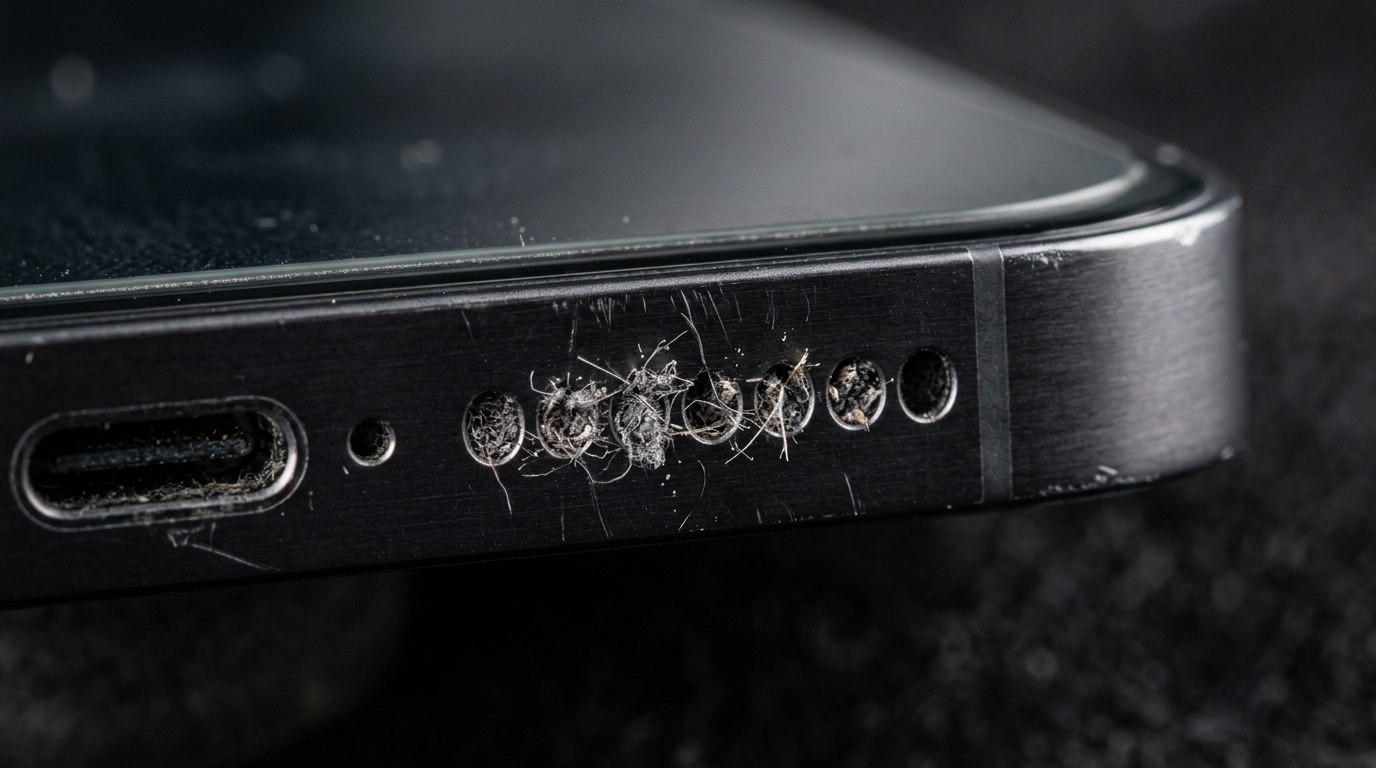
Why Does Dust Build Up in Your Phone Speaker?
Speaker dust builds up because your phone’s speaker grille is essentially an open mesh that sits in your pocket, bag, or hand all day, and airborne particles have nowhere else to go but in. Every time you slide your phone into a pocket lined with fabric fibers, set it on a car seat, or carry it through a construction site or gym, microscopic debris gets pulled toward the speaker mesh by simple friction and, more often than people realize, by static electricity. The oleophobic coating on your screen repels oil, but the speaker port has no such defense — it’s a bare acoustic opening designed for sound transmission, not particle resistance.
Over weeks and months, this dust buildup compounds. What starts as a faint layer of pocket lint on the acoustic mesh eventually thickens into a physical obstruction that dampens the speaker driver’s output. I’ve inspected dozens of “broken” phone speakers over the years that turned out to be nothing more than a clogged grille — the diaphragm and voice coil were completely intact, but the sound had nowhere to escape cleanly. This is precisely why muffled sound is the single most common complaint tied to dust, not hardware failure.
People who work in dusty environments — construction workers, outdoor workers, warehouse staff, or anyone who spends time at the beach — see this problem far faster than the average user. So do gym-goers whose phones sit against lint-heavy gym shorts or armbands for an hour at a time. If you’ve noticed your phone speaker sounding progressively quieter or more distorted over several weeks rather than suddenly, dust accumulation — not water or hardware damage — is almost always the underlying cause.
Why Should You Avoid Water When Cleaning Speaker Dust?
You should avoid water on a dust-clogged speaker because water and dust are two entirely different problems that require two entirely different fixes, and treating dust with a liquid-based method can actually make things worse. Dust is a dry, particulate obstruction; water is a moisture-based one. Spraying, dripping, or running water-ejection routines on a speaker that’s simply full of lint doesn’t clear the blockage — it often turns dry dust into a damp paste that packs even more tightly into the speaker holes.
This distinction matters more than most guides admit. Many popular sound-wave water ejection tools use a 165Hz frequency or similar low-frequency vibration to physically shake water droplets out of a speaker cavity, and that’s a legitimate, well-documented technique for actual water damage. But applying that same water-ejection logic to a dust problem misses the point entirely — there’s no liquid to eject, so the vibration alone does little for tightly packed lint, and users who add moisture “just in case” risk oxidation on internal contacts. If your phone hasn’t been submerged, splashed, or exposed to rain, and you’re not seeing a triggered liquid contact indicator, you’re dealing with a dry cleaning method problem, not a wet one.
IP68 and IP67 ratings also create a common point of confusion here. These ingress protection ratings measure resistance to water and dust ingress under lab conditions, but they don’t mean a modern smartphone is immune to lint accumulation in daily use — a water-resistant phone can still get visibly dusty inside the mesh over time, because the rating protects against submersion, not against fine particles settling in an open acoustic port during normal handling. Checking your phone’s manufacturer warranty policy before attempting any liquid-based fix is also worth doing, since certain repair centers flag improper moisture exposure during diagnostics.
What Are the Best Tools and Methods to Remove Dust From a Speaker?
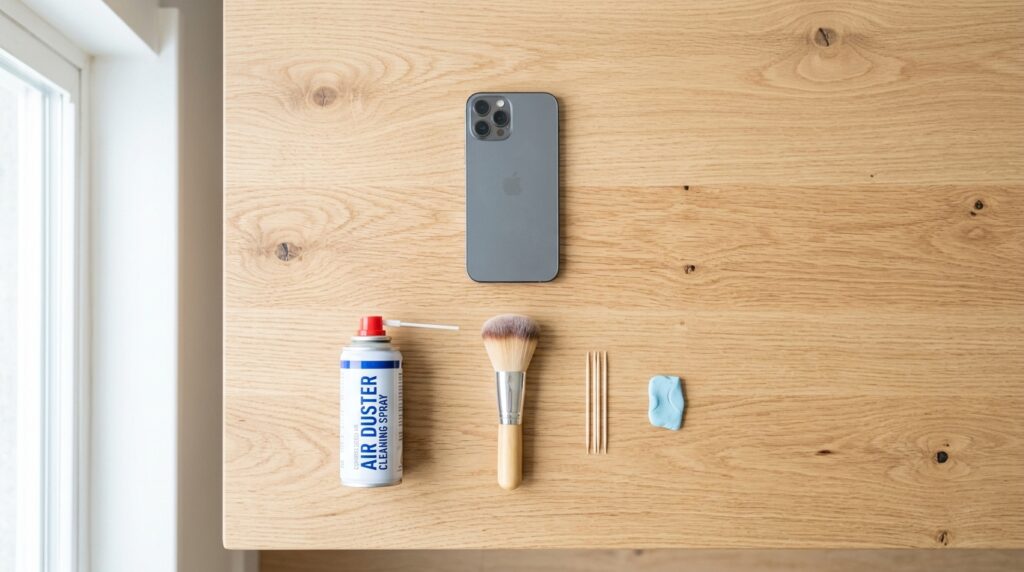
The best tools for removing speaker dust are compressed air, a soft-bristle brush, a sound-wave cleaning app, and — for stubborn cases — a non-metallic pick like a toothpick or a small piece of adhesive tape. Each tool targets the problem differently, and using them in combination typically clears even moderately packed dust particles without any risk to the internal components.
How Does the Compressed Air and Soft-Bristle Brush Method Work?
A compressed air canister dislodges loose dust through short, controlled bursts of pressurized air aimed at an angle across the speaker grille, while a soft-bristle brush physically sweeps out what the air loosens. This two-step combination is the safest starting point for almost anyone, since neither tool makes direct contact with the speaker driver itself. Hold the canister a few inches away and use two-to-three-second bursts rather than one continuous spray — sustained pressure can push some particles deeper into the mesh instead of out.
An anti-static brush or a clean, dry makeup brush with fine nylon bristles works well for the follow-up sweep. I generally recommend brushing in one consistent direction — away from the speaker opening — rather than scrubbing back and forth, which tends to redistribute dust rather than remove it. This method alone resolves the majority of mild-to-moderate dust cleaner cases I’ve seen, especially when paired with gently tapping the phone speaker-side-down against your palm to let gravity assist.
How Does Sound-Wave Dust Ejection Work?
Sound-wave dust ejection works by playing a specific tone or frequency pattern through the speaker that causes the diaphragm to vibrate rapidly enough to physically shake loose particles free. Free browser-based tools and dedicated speaker cleaner apps generate these tones without requiring a download, which makes them a convenient first or second attempt before resorting to manual tools. The acoustic resonance created by these frequencies is genuinely effective on lightly packed dust, though it tends to be less reliable than manual brushing on heavier, compacted buildup.
It’s worth noting that most sound-wave tools were originally engineered around water ejection use cases, and their dust-clearing effect is a secondary benefit rather than the primary design goal. That’s fine — it still works — but don’t expect a single 30-second tone cycle to fully clear a speaker that hasn’t been cleaned in over a year. Running the tone two or three times, with a brush pass in between, produces noticeably better results than relying on the app in isolation.
Can You Use a Toothpick, Tape, or Putty to Remove Dust?
Yes, a wooden or plastic toothpick, a strip of adhesive tape, or reusable putty can all extract stubborn dust when air and brushing alone aren’t enough, but each carries a real risk of damaging the speaker mesh if used carelessly. A toothpick should only ever be used to gently loosen visible clumps at the surface — never inserted deep into the grille, since even a small amount of pressure can puncture the thin mesh layer or push debris directly onto the diaphragm. Painter’s tape, folded sticky-side-out and pressed lightly against the speaker holes, lifts surface-level lint without any insertion risk at all.
Blu tack or a similar reusable adhesive putty is my preferred manual tool for genuinely stubborn buildup, because it conforms to the shape of the grille and pulls particles out through gentle contact rather than force. Avoid metal pins, paperclips, or sewing needles entirely — they’re rigid enough to scratch or tear the mesh, and I’ve seen more speakers damaged by a determined pin than by dust itself.
How Do You Clean Dust Out of a Speaker Step by Step?
You clean dust out of a speaker by preparing the phone, working through a short sequence of air, brush, and sound-based steps, then testing the result before deciding whether to repeat or escalate. Rushing this sequence, or skipping the preparation stage, is the most common reason people report inconsistent results with otherwise correct techniques.
How Should You Prepare Your Phone Before Cleaning?
Power off your phone, remove any case or screen protector near the speaker area, and set it on a clean, well-lit surface before you begin. Powering down eliminates the small risk of triggering unwanted vibration or audio output mid-cleaning, and it also protects against any accidental short if you’re using a tool near the charging port at the same time. Take a moment to visually inspect the speaker port with a flashlight — knowing exactly where the dust is concentrated tells you whether you’re dealing with a bottom-firing loudspeaker, an earpiece speaker, or both, which changes your approach slightly.
What Is the 5-Step Dust Removal Process?
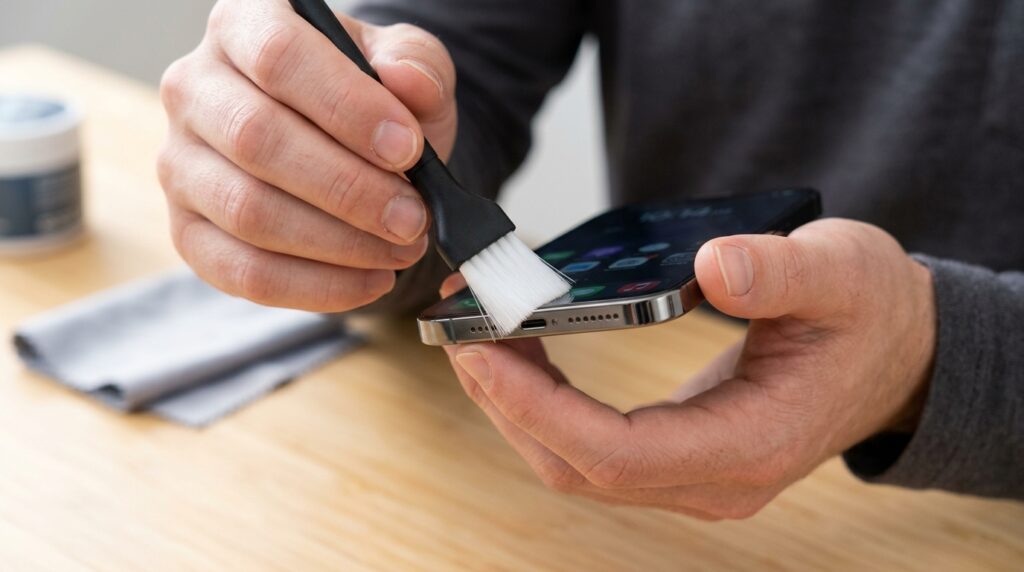
The five-step process is: brush the visible grille, apply short bursts of compressed air, run a sound-wave cleaning tone, test the speaker at moderate volume, and repeat any step that didn’t fully clear the sound. Start with the brush to remove loose surface debris, since skipping straight to air can blow surface lint deeper into the cavity rather than out. Follow with two or three short air bursts at an angle, then run a cleaning tone through a speaker cleaner app for roughly 30 seconds.
Once you’ve completed a full pass, play a familiar audio clip or voice memo at a moderate volume and listen specifically for distorted audio, crackling noise, or an uneven volume between the two channels if your phone has stereo speakers. If the sound has improved but isn’t fully clear, repeat the full cycle once more — but avoid running more than two or three consecutive cycles, since excessive compressed air exposure in a short window offers diminishing returns and unnecessary wear.
What If Cleaning Doesn’t Fix the Muffled Sound?
If dust-focused cleaning doesn’t resolve a muffled sound after two or three attempts, the issue is likely a speaker driver failure, internal water residue, or another hardware fault rather than surface dust. At this point, continuing to force air or tools into the grille won’t help and may cause damage. A diagnostic test at an authorized service center, or a reputable third-party repair shop, can confirm whether the speaker driver itself needs replacing.
This is also the point where cost matters. An iPhone speaker repair through an authorized provider is typically more expensive than third-party or DIY-adjacent solutions, but it preserves your manufacturer warranty policy in a way that opening the phone yourself does not. If your phone is still within its coverage window and hasn’t shown a triggered liquid contact indicator, checking your Apple warranty terms or your Samsung warranty terms before paying out of pocket is worth the ten minutes it takes.
How Do You Clean Dust From iPhone and Android Speakers Differently?
You clean dust from iPhone and Android speakers using the same core tools, but the exact grille layout, port locations, and mesh sensitivity differ enough between brands that a one-size-fits-all approach misses some nuance. Knowing your specific device’s speaker configuration prevents you from accidentally targeting the wrong opening or applying pressure near a sensitive component like a microphone or sensor array.
How Do You Clean Dust Out of an iPhone Speaker?
On an iPhone, dust typically concentrates in the bottom-firing speaker grille next to the Lightning port or USB-C port on newer models, as well as in the top earpiece mesh. Because iOS devices route audio through both the bottom speaker and the earpiece for stereo playback on most modern models, a clog in either location noticeably affects call clarity or media playback. Use the brush-and-air method first, being especially careful around the earpiece mesh, which sits closer to the Face ID sensor array on Face ID-equipped models and should never be probed with a rigid tool.
Apple’s own support guidance recommends a soft, dry, lint-free cloth and a soft-bristle brush for external cleaning, and explicitly advises against inserting objects into any opening — a rule worth respecting given how tightly packed iPhone internals are. If you’re specifically noticing speaker crackling on an iPhone after using tape or putty methods, stop and switch back to air and brush only, since crackling after manual cleaning can indicate the diaphragm was disturbed.
How Do You Clean Dust From Samsung and Other Android Speakers?
On Samsung, Google Pixel, OnePlus, Xiaomi, Redmi, Realme, Vivo, Oppo, and Motorola devices, the dust-prone areas are similarly the bottom-firing loudspeaker and, on many models, a secondary earpiece speaker that doubles as part of a stereo pair. Android phones vary more in grille design than iPhones do, since each manufacturer uses its own housing tolerances, so it’s worth a quick visual check to confirm whether your specific model has one or two external speaker openings before you start.
The brush-and-air sequence works identically across brands, but Samsung’s Galaxy line in particular has a reputation among repair technicians for tightly spaced grille perforations that trap fine dust more stubbornly than looser designs — a sound-wave app cycle before manual tools tends to produce better first-pass results on these models. If you’re using a dedicated speaker cleaner app for Android, confirm it’s compatible with your device’s audio hardware, since a small number of budget Android models don’t support the higher-frequency tones some cleaning tools rely on.
How Can You Prevent Dust From Building Up in Your Speaker Again?
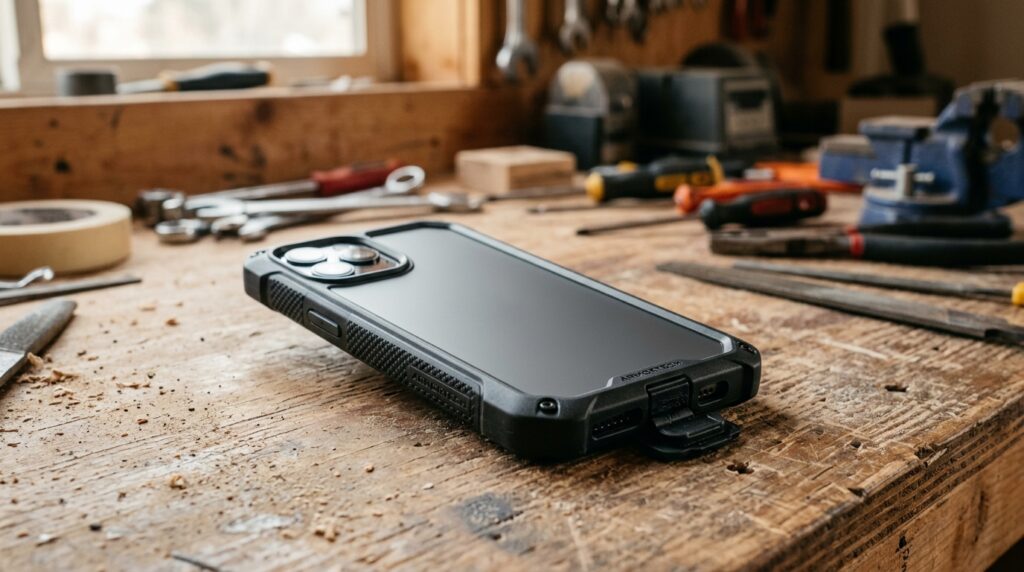
You prevent future dust buildup by controlling how and where your phone makes contact with lint-generating surfaces, and by cleaning on a consistent schedule rather than waiting for muffled sound to reappear. Prevention takes far less effort than repeated deep cleaning, and it meaningfully extends the practical lifespan of the speaker component.
What Daily Habits Reduce Dust Exposure?
Using a phone case with a mesh or raised cover over the speaker opening, avoiding direct pocket contact in lint-heavy fabric, and storing your phone in a dedicated bag compartment rather than loose alongside keys or sand are the habits that matter most. If you regularly visit dusty work environments, an IP68-rated case with port plugs adds a meaningful layer of protection beyond what the phone’s built-in rating provides on its own. Removing your case periodically to check for trapped lint underneath it is also worth doing, since some cases trap more debris against the speaker than they keep out.
How Often Should You Clean Your Phone Speaker?
A light cleaning pass every one to two weeks, with a more thorough brush-and-air session monthly, keeps most speakers clear before dust has a chance to compact into a stubborn blockage. Heavier users — construction workers, gym regulars, frequent travelers — benefit from cleaning after each dusty outing rather than sticking to a fixed calendar schedule. This routine maintenance approach is consistently more effective than infrequent deep cleaning, since compacted dust that’s been sitting for months is measurably harder to remove than a light weekly buildup.
What Common Mistakes Damage Speakers During Dust Cleaning?
The most damaging mistakes are inserting metal objects into the grille, using excessive vacuum suction, applying compressed air from too close a range, and attempting a water rinse on a dust-only problem. A paperclip or safety pin might feel precise, but the rigidity that makes it feel effective is exactly what tears thin speaker mesh or punctures the diaphragm underneath it. High-suction vacuum attachments carry a similar risk — the pressure differential can pull the diaphragm outward and permanently deform it, which is a far more expensive mistake than the dust problem you started with.
Forceful tapping, dropping the phone repeatedly to “shake dust loose,” and using cotton swabs are three more habits worth retiring. Cotton bud fibers frequently shed into the very grille you’re trying to clean, effectively trading one debris problem for another, while repeated impact risks loosening internal components that have nothing to do with dust at all. If you’ve already opened your phone’s housing in a DIY attempt, be aware that this typically voids the water-resistance seal even if the phone was never exposed to liquid, which matters for future warranty claims regardless of how the original problem started.
Frequently Asked Questions
How do I remove dust from my phone speaker? Use a soft-bristle brush and short bursts of compressed air first, then follow with a sound-wave cleaning app if the sound hasn’t fully cleared. For stubborn buildup, a folded piece of adhesive tape or reusable putty pressed gently against the grille lifts out packed debris without inserting anything into the opening.
Can dust damage a phone speaker? Yes, prolonged dust buildup can strain the speaker driver and diaphragm over time, though the dust itself rarely causes permanent damage as quickly as improper cleaning attempts do. The more immediate effect is muffled sound, reduced volume, and crackling caused by the physical obstruction rather than internal wear.
What is the best way to clean dust out of a speaker without water? Compressed air combined with a soft-bristle brush is the safest and most reliable dry method, with a sound-wave cleaning app as a useful secondary step. Water should be avoided entirely unless you’ve confirmed actual liquid exposure, since it can turn dry dust into a compacted, harder-to-remove paste.
How do I know if my speaker has dust in it? Visible debris in the speaker holes under flashlight inspection, along with muffled sound, reduced volume, or crackling during calls and media playback, are the clearest indicators. A gradual decline in sound clarity over several weeks — rather than a sudden change — usually points to dust rather than a hardware fault.
Why does my speaker sound muffled from dust? Dust physically blocks part of the speaker port, dampening the sound waves as they try to exit the grille and reducing both volume and clarity. The diaphragm itself is typically undamaged; it’s the obstruction in front of it that’s responsible for the muffled effect.
How often should I clean dust from my phone speaker? A light cleaning every one to two weeks and a deeper brush-and-air session monthly is a reasonable baseline for most users. Anyone working in dusty conditions regularly should clean after each exposure rather than waiting for a fixed schedule, since compacted dust is harder to remove than light, recent buildup.
If brushing and compressed air haven’t fully cleared the buildup, running a dedicated sound-wave cycle is often the fastest way to shake loose whatever’s left. Fix my speaker in seconds — just play the tone directly from your browser, no app download or signup required.
4 thoughts on “How to Clean Dust Out of Your Phone Speaker (Without Water): The Complete Guide”